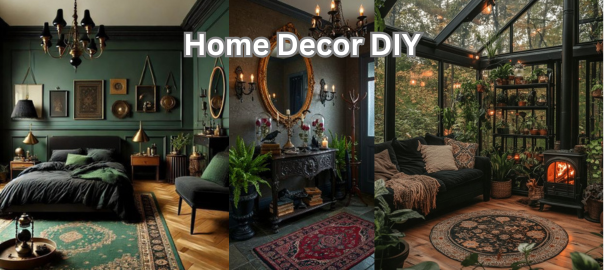
Hey girlies, fashion lovers, and queer creatives! If you’ve ever wished your room looked like your Pinterest board—pastel gradients, glitter accents, and pride-forward details—you’re in the right place. This guide is a love letter to self-expression on a budget.
DIY décor isn’t just crafty; it’s identity-affirming. You’ll find 30+ detailed projects that blend runway vibes, nail-salon glam, and cozy comfort, all crafted to be renter-friendly and wallet-kind. Pick a palette, cue a playlist, and let’s make your space feel like you.
Why DIY Home Décor Works for Girlies & Queer Fashionistas
Personal Style = Personal Sanctuary
Your room should reflect your mood board: blush pinks, lavender haze, chrome accents, or rainbow brights. DIY lets you curate a space that mirrors your nails, your fits, and your energy.
Affordable, Custom, and Sustainable
Thrifted frames, off-cut fabric, leftover nail polish—these become luxe details in your hands. You get one-of-a-kind pieces without the big-box price tag and keep things eco-conscious.
It’s Self-Care (with Glitter)
Crafting slows your scroll and quiets your mind. The result? A soothing space you’re proud to wake up in every day.
Before You Start: A Quick Styling Playbook
- Pick a palette (2–4 shades): Try blush + cream + gold, lilac + mint + silver, or full rainbow pastels.
- Mix textures: Matte paint + glossy acrylic; soft velvet + metallic foil.
- Repeat motifs: Hearts, bows, stars, or checkerboard—repetition = cohesion.
- Renter-safe mindset: Removable hooks, washi tape, Command strips, lightweight frames.
- Batch your crafting: Prime/spray multiple items at once; glitter-seal in one session.
(Internal link idea: “How to Build a Capsule Color Palette for Your Home”)
30+ DIY Projects with Materials & Step
Each mini-tutorial is short, doable, and beginner-friendly. Skim, star a few, and craft a coordinated collection.
1) Press-On Nail Art Shadowbox
Materials: Shadowbox, velvet/felt, hot glue, press-on sets, tweezers.
Steps: Remove the glass. Wrap the backing in velvet and glue neatly. Arrange press-ons in rows and dot hot glue to secure. Reassemble and hang for a chic “mani gallery.”
2) Glitter-Dipped Vase
Materials: Glass vase, painter’s tape, craft glue, fine glitter, clear sealer.
Steps: Tape a clean line around the vase. Brush glue on the lower half and dust glitter over a tray. Tap off excess, dry, then seal to prevent shedding.
3) Ombre Pastel Canvas
Materials: Canvas, 3 pastel acrylics, foam brush, water, paper towel.
Steps: Paint the top with the lightest shade, blend into mid-tone, then darkest at bottom. Keep the brush slightly damp for buttery transitions. Dry and hang.
4) Rainbow String Art (Pride)
Materials: Wooden board, tiny nails, hammer, rainbow floss, pencil, sealer.
Steps: Sketch an arc. Tap nails evenly along the line. Tie floss at one nail, weave across color by color until full, trim tails, and seal the board.
5) Pearl-Trimmed Lampshade
Materials: Plain shade, pearl trim, fabric glue/hot glue.
Steps: Measure circumference, cut trim, and glue along top and bottom rims. Stack two rows for extra glam and let it cure fully before use.
6) Pride Flag Plant Pots
Materials: Terracotta pots, acrylic paint, painter’s tape, outdoor sealer.
Steps: Tape clean lines for stripes (bi/pan/trans/rainbow). Paint two thin coats, peel tape while tacky, and seal to handle watering drips.
7) Fairy-Light Mason Jars
Materials: Jars, battery micro-lights, ribbon.
Steps: Coil lights inside, hide the switch behind a ribbon bow. Cluster three jars for a dreamy bedside glow.
8) Color-Block Acrylic Tray
Materials: Clear tray, masking tape, nail polish or acrylic paint, isopropyl alcohol.
Steps: Clean tray, tape geometric blocks, paint thin coats, peel tape for crisp lines. Cure fully before placing perfumes/jewelry.
9) Photo Collage Wall (No Damage)
Materials: Prints, magazine clippings, washi tape, level or straight edge.
Steps: Map on the floor first. Start from center at eye level. Use washi as faux frames and maintain even gaps for a curated, renter-safe gallery.
10) Thrifted Chair Glow-Up
Materials: Old chair, sandpaper, primer, pastel paint, topcoat.
Steps: Scuff-sand, prime, then paint two coats in your palette. Add a cushion or bow-back tie for a couture finish.
11) Metallic Mirror Frame
Materials: Mirror, painter’s tape, metallic spray, drop cloth.
Steps: Tape off the glass, spray the frame in light passes (rose gold/chrome). Dry, peel tape slowly, buff any overspray on glass with a razor + alcohol.
12) Affirmation Poster
Materials: Heavy cardstock, paint pens, ruler, frame.
Steps: Draft your lettering in pencil, go over with paint pen, add star/bow flourishes. Frame for immediate mood-boosting energy.
13) Washi-Tape Faux Frames
Materials: Several washi rolls (patterns/solids).
Steps: “Draw” rectangles and ovals on the wall with washi around prints or Polaroids. Layer a second border color for dimension.
14) Sequin Pillowfront
Materials: Plain pillow cover, sequins, needle/thread or fabric glue.
Steps: Sketch a heart or bow outline. Stitch or glue sequins closely for a dense sparkle. Let dry fully before stuffing insert.
15) Rhinestone-Edged Frames
Materials: Thrift frames, rhinestone chain, E-6000 or strong craft glue, tweezers.
Steps: Run a thin glue bead along the frame face. Lay chain carefully with tweezers. Press gently and dry flat overnight.
16) Fabric Wall Panels
Materials: Canvas frames or foam boards, fabric, staple gun or double-sided tape.
Steps: Iron fabric, center pattern, wrap around backing, and staple or tape taut. Hang in a grid for a high-impact backdrop.
17) Glitter Resin Coasters
Materials: Plain coasters, epoxy resin kit, fine glitter, mixing cups, gloves.
Steps: Mix resin per instructions, stir in glitter, pour, and pop bubbles with a quick torch pass or toothpick. Cure on a dust-free surface.
18) Perfume Bottle Bud Vases
Materials: Empty perfume bottles, warm soapy water, funnel, flowers.
Steps: Clean, remove labels if desired, fill with water via funnel, add a single bloom. Cluster a trio for a luxe vanity vignette.
19) Acrylic Magazine Holder with Decals
Materials: Clear holder, vinyl decals or cut vinyl, squeegee.
Steps: Place decals carefully, smooth with squeegee to avoid bubbles. Label categories (lookbooks, zines) for a boutique-studio feel.
20) Painted Bead Garlands
Materials: Wood beads, skewers, acrylic paint, twine.
Steps: Thread beads onto skewers and paint in your palette. Dry, then knot onto twine and drape across mirrors or shelves.
21) Painted Mason Jar Brush Pots
Materials: Jars, chalk paint or acrylic, clear coat.
Steps: Paint two coats outside the jar, distress edges lightly for shabby-chic, then seal. Store makeup brushes, pens, or tools.
22) Lace-Trim Baskets
Materials: Woven basket, lace trim, hot glue, ribbon.
Steps: Glue lace around the rim; add a ribbon bow to the handle. Style on shelves for soft texture and hidden storage.
23) Rainbow Dreamcatcher
Materials: Metal hoop, yarn, rainbow ribbons, beads, feathers (optional).
Steps: Wrap hoop in yarn, weave a simple web, then tie ribbons by color order. Bead the ends for movement and sparkle.
24) DIY Vinyl Quote Decals
Materials: Adhesive vinyl, cutting tool or cutting machine, transfer tape.
Steps: Cut your mantra, apply transfer tape, then smooth onto the wall or mirror. Peel carefully for a crisp, removable statement.
25) Faux Floral Centerpiece
Materials: Faux stems, vase, floral foam, wire cutters.
Steps: Cut stems to staggered heights, insert into foam, and rotate the vase as you fill. Finish with a satin ribbon around the neck.
26) Crystal/Geode Bookends
Materials: Heavy crystals or geode fragments, felt pads, clear adhesive.
Steps: Clean bases, stick felt pads to protect shelves, and pair by size. Group with art books for a glam library moment.
27) Ombre-Dip Curtains
Materials: White curtains, bucket, fabric dye, salt (if recommended).
Steps: Wet curtains, dip the bottom third in dye, then slowly lift for gradient. Rinse to set and hang dry for a breezy pastel wash.
28) Nail-Polish Marble Candle Cups
Materials: Glass cups, disposable tub, room-temp water, nail polish.
Steps: Drip polish onto water, swirl with a toothpick, and dip cup exterior. Dry upside-down and hand-wash only later.
29) Spray-Painted Plant Stand
Materials: Metal/wood stand, primer, spray paint, clear coat.
Steps: Prime, then spray in light passes (mint/chrome/rose-gold). Clear-coat for durability and top with a statement plant.
30) Decoupaged Jewelry Box
Materials: Wooden box, pretty papers (wrapping, magazine, prints), Mod Podge, brush.
Steps: Cut papers to panels, glue down, smooth bubbles, and seal with two thin top coats. Add a velvet liner if you’re extra.
31) Bow-Handle Dresser Hack
Materials: Dresser, bow-shaped handles or ribbon + hardware, screwdriver.
Steps: Swap existing pulls for bow handles. If using ribbon, tie neat bows around ring pulls or loop through hardware for an instant coquette upgrade.
32) Mirror Border with Shells or Pearls
Materials: Flat mirror, faux pearls/shells, strong adhesive, ruler.
Steps: Measure equal borders, draw light guides, and glue embellishments edge-to-edge. Wipe stray glue before it sets.
33) Holographic Acrylic Nameplate
Materials: Clear acrylic plaque, holographic vinyl, cutting tool.
Steps: Cut your name/handle from holo vinyl, apply to acrylic, and prop on a mini easel. It doubles as a desk branding moment.
34) Checkerboard Accent Tray
Materials: Wood tray, painter’s tape, two paints, clear finish.
Steps: Tape a checker grid, paint alternating squares, peel tape carefully, and seal. Style with a candle, a mini vase, and your favorite rings.
35) Pastel Pegboard Vanity Wall
Materials: Pegboard, hooks/shelves, pastel paint, anchors.
Steps: Paint the board, mount with wall anchors, and arrange hooks for hair tools, bows, and jewelry. It’s storage that looks like an art install.
Room-by-Room Styling Ideas
Bedroom Sanctuary
Keep your nightstand light and layered: a glitter-dipped vase with dried florals, a resin coaster for your cup, and a small affirmation frame. Above the headboard, hang fabric panels for instant softness.
Vanity & Closet Corner
Cluster perfume bottle bud vases, a color-block tray for glosses, and a holographic nameplate. Mount a pegboard for hair tools, claw clips, and bows so it stays cute and functional.
Study/Desk Setup
Use painted jar brush pots, an acrylic magazine holder, and a mini checker tray for AirPods and rings. A washi-tape gallery above the monitor keeps it renter-safe.
Entry Nook
A metallic mirror, bead garland, and a small decoupaged box for keys make arrivals feel curated. Add a spray-painted plant stand for a pop of life.
Sourcing on a Budget (and Ethically)
- Thrift first: Frames, glassware, baskets, and mirrors are abundant and upcycle beautifully.
- Dollar store runs: Grab glitter, glue, washi, foam boards, and jars.
- Shop your stash: Old nail polishes, failed prints, and ribbon scraps often become the cutest accents.
- Safety & cleanup: Ventilation for sprays/resin, nitrile gloves, and a dedicated glitter tray keep things stress-free.
Photography Tips (So Your DIYs Pop Online)
- Natural light wins: Shoot near a window; turn off harsh overheads.
- Declutter the frame: Style the hero piece with 2–3 supporting items.
- Angles & crops: Straight-on for structure; 45° for dimension; close-ups for texture.
- Consistency: Use the same backdrop or surface so your feed looks cohesive.
FAQ
1) I’m not crafty—where should I start?
Begin with washi-tape frames, photo collage walls, or perfume bottle vases. They’re fast wins that build confidence. As you level up, try the ombre canvas or checker tray—both forgiving and satisfying.
2) Will these damage my rental?
Stick to removable hooks, Command strips, and washi tape. Heavier pieces can lean on shelves or dressers instead of being wall-mounted. For paint, focus on objects (trays, vases) rather than walls.
3) How do I keep glitter from shedding?
Use a thin glue base and a clear sealer once dry. Work over a tray so you can pour excess glitter back into the jar and save both money and mess.
4) What’s a good starter toolkit?
Craft glue, hot-glue gun, painter’s tape, scissors, small brush set, foam brush, utility knife, measuring tape, ruler, and a drop cloth. Add spray paint and a basic drill/driver as you grow.
5) How can I make everything look cohesive?
Choose a core palette and repeat motifs (bows, stars, hearts). Echo finishes across projects—e.g., rose-gold hardware + pearl trim + pastel paint = instant harmony.
Call-to-Action
Your home is your soft spot to land—and now you’ve got 30+ cute, affordable ways to make it sparkle. Pick three projects that share a color palette, grab your besties for a craft night, and turn on your favorite playlist. Then show us your glow-ups with #DIYHomeDecorGirlies so we can cheer you on.
- Check out how to keep your diy’s protected “How to Seal, Topcoat, and Protect Your DIYs for Daily Use”